Monday, May 18, 2020

10 simple tips for getting started with beginner jewelry

Here are 10 simple tips for getting started with beginner jewelry.


1. Choose the type of jewelry that interests you the most.

It can be really overwhelming when you decide for the first time you want to try making jewelry because there are so many possibilities! Just as you do not expect to learn how to crochet, knit, sew, quilt and embroider all at once, it is unrealistic to try to deal with all types of jewelry that are made when you first start. Instead, choose a type you want to do first and go from there.

Maybe you like to wear beaded jewelry the best, or you might prefer the simple look and customization of metal stamped jewelry. You may want to work with leather, clay or glass. Choose a medium to focus on first, knowing that you can always try something else later.

and in fact, the skills can build on each other and you will have an easier time learning a new technique because of what you can already do!

2. Need some basic skills.


Whether you plan to work with pearls, clay metals or any other type of jewelry first, there are some skills that you will want to know for almost every project you do. Most projects, for example, will require you to have basic knowledge of how to open and close a jump ring properly and form a simple wire loop. When you understand these skills, they are transferred to the type of project you are creating.

3. Invest in good quality tools.

For your first try, it may work okay to just "borrow" the wire cutters and pliers from your household's toolbox. But the reality is the better the tools you have to work with, the easier the process becomes and the better your project becomes.

First, it may seem like a bit of an investment, especially when it comes to special tools like metal fringes. But in the long run, they pay more than themselves when one can create rather than buy jewelry and make jewelry to give as gifts and / or sell to others. When you have the necessary tools in your stash, it is usually very cheap to do a certain piece.

4. Learn the terminology.

What is the difference between and a head pin and an eye pin? Is 12-gauge wire thicker or thinner than 20-gauge wire? And what are "thoughts" anyway? You have to know! Before you buy anything, make sure you know what it is that you need. It saves time, cost and frustration of having to return and exchange wrong things. There are lots of great resources to help you, like this beginner's guide to working with thread or this basic introduction to metal stamping.

5. Get your hands on some items, literally.

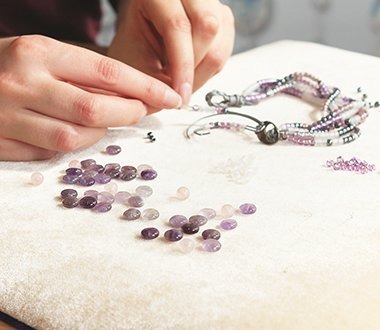
There are countless alternatives for where to buy jewelry that makes goods. Online stores such as Goody Pearls, Lima Pearls and P&J Tool Supply have large stocks, and you can always find almost what you are looking for on Etsy.

Before choosing your favorite online suppliers, I would encourage you to find a local craft store and literally get your hands on some of these tools and accessories. Watch them, touch them and choose exactly what you want.

I ordered things before it ended up being not at all what I expected just because of my lack of experience. For example, I had no idea what a 4mm bead really looked like, so when I ordered a whole pack and they turned out I was shocked at how small they were. Join hands on some things and get acquainted with them.

Later, when you get into a track and know what you like to work with, you can simply order online, but I still personally love the experience of seeing things for myself before I buy.

6. Have and organize your own work space.


There is nothing more frustrating for a crafter (or their family!) Than having random accessories strewn everywhere. If you do not find what you need, you are wasting precious time that you can use to create.

Choose a room in the house - or at least a certain table, desk or drawers - that you can just devote to your hobby. When you have it, sort your goods and labels, labels, labels. There are all kinds of jewelry that make storage ideas like cheap trays and boxes you can get that already have dividers in them to easily store different beads, bargains and more. Find out a system that works for you and stick to it. That way you always know what you have and it will be in your arm when inspiration strikes!


7. Browse online for inspiration.


Sometimes a good idea for a new piece of jewelry will come into my mind. But usually, when it comes to making jewelry, I am inspired by what I see.

Look around you for inspiration. Check out jewelry for sale in your favorite clothes and accessories stores. Browse Pinterest. Find some favorite bloggers you like and check out their jewelry archives. And, of course, search Craftsy here for ideas! There are over 2100 bracelet projects here alone, not to mention that there are over 11,000 total jewelry projects, including necklaces, earrings and more.

Sometimes you find a good guide that you want to follow step by step, or you can just find something that appeals to you and you want to adjust the colors, size or style a little to suit your own preferences.

8. Take a class.


Is there anything specific you want to learn? Take a class and let an experienced instructor go through the process! You're already in the right place. Craftsy offers all kinds of classes, some of which are even free, where you can learn a variety of jewelry-making skills. You can take a basic beginner class or choose a course on a specific technique such as wire packaging, resin work or soldering. You may also find a class at your local craft or specialty bead shop where you can learn in person.

9. Don't be discouraged.


Just like any other skill, make your own jewelry a learning curve. The first thread loop you try to create will look like a hot mess. And that's okay! Since the other will look better and with the tenth you will feel like a pro. Do not let a difficult or unsuccessful project ruin your enthusiasm. Just keep trying, keep training and remember that all skills take time to develop.

10. Take risks!


Don't be scared to try a certain skill because you think it looks or sounds difficult. I always love to make friends play with my metal stamping tools and see how easy it is to create my own personal pieces. So many people are frightened by the thought, but with the right tools, they are surprised at what they can do!

Do not limit yourself to a particular style, color or size of jewelry. Play with your goods, try new things and see how you like them! Experiment with different materials and see what happens. Some of my favorite pieces are things I didn't even know about when I started doing them. The sky is the limit.

reach for it!

Congratulations on starting this fun new hobby. When you start, you quickly see that it is completely addictive! Don't say I didn't warn you! Be sure to send your own jewelry creations here at Craftsy as well so we can see what you did!

Bead bracelets and jewelry for beginners

Have you recently become interested in pearls and jewelry making? Congratulations, you can have a versatile and rewarding hobby in front of you to discover! Here are some small tips on where to turn and what's good to think about when you start to pearl.


Literature and websites


There is a lot that you can learn for free over the internet. where you will find a lot of information about pearl types, dimensions, techniques, tools, accessories, stores, books and more. If you want a reference work, which shows different techniques are made and gives information about pearls, threads, tools and accessories. Basic information and techniques, such as finishing jewelery and bracelets with clasp beads or making loops on hat sticks, are also available. If you find it difficult to combine colors in jewelery and other beads, there are books especially about this.

Courses and videos


If you find it difficult to learn via text and image only, you can choose to take a course instead. The advantage is also that there is a teacher present, who can constantly answer your questions and show where you are wrong if something fails. The disadvantage is usually the price and / or that courses are not held at the place of residence. Courses in basic jewelry making can be found through pearl shops or student associations. Inquire with stores and associations in your area or search the web for courses.

The modern technology and services provided by YouTube have also made it possible to post video courses online. In 99 cases out of 100, these are in English, but if you do not master the language, sometimes just the fact that you get to see something can be done to great help. There are also animations of techniques that are difficult to capture in photos (mainly stitched techniques where small beads are used).

Materials and tools


Although you will come across many different materials, accessories and tools, you do not need much to get started. Some materials and tools are general and used for most bead techniques, while others are more specialized. The latter you can wait to buy in until you feel that you want to invest in a certain orientation or really benefit from them.

When it comes to tools, you don't have to buy the most expensive ones. Just make sure you choose a set that fits well in your hand. Ideally, you should use so-called electronic pliers, which do not have grooved jaws. With a side cutter, flat pliers, pointed rods, angled pointed rods and round rods you will come a long way, these are also often sold in finished kits. Keep in mind the chunks are made for softer metals: special pliers are required for memory wire and hard steel wire.

Another important material is the threads. Threaded jewelery is usually used for threaded jewelry. There are a variety of threads to choose from in the bead shops. What they can all be used for, their strengths and weaknesses and more you can read more about. To some extent, the choice of thread also depends on personal appearance and taste, so dare to test a few different materials, as long as they are adapted to the technology you are working with.

In the beginning, it is a lot to test yourself when making your first bracelets, which does not require expensive or high quality beads. You can start with cheap pearls and buy what you like. Do not forget to buy small beads, up to 3 mm, which work well to use as so-called medium beads between the larger ones. Over time, you will develop a sense of quality and material.

Where to Buy

Some stores also have jewelery and pearl kits for beginner bracelet manufacturing, which suits you who want to get a finished mix of beads and jewelry parts to work with. Although the kit is often adapted for a specific project, you can vary according to your own taste and taste. So note that there are project kits and "free kits" of which the latter contains the most important components for making jewelry without you being limited to a specific project.

Silversmithing for beginners - get started

Gold or silver forging - what should I choose?

Silversmith is traditionally a craft where you create larger sculptural objects such as jugs, bowls and candlesticks. The correct definition of silver forging is the creation of objects by shaping silver with the help of hammers and anvils, while goldsmithing is largely about molding and making small details such as stone engravings in jewelry. So these are two different techniques, but today these have been mixed. What many people are referring to when talking about silver forging today is really gold forging in silver.


Thus, silver forging is a good start even for those who are curious about goldsmithing. Given the gold price, it may also be a good idea to start working in silver to learn the basics. So, how do you go about learning to forge in silver?


Silversmithing for beginners - step by step

The content of a silversmith course may vary depending on the course structure and the course leader's experience, but this is the approximate development curve if you take a course or learn at home.

1. Start (right) a little!

A ring is a fairly small object to start with to learn the basic techniques of silversmithing. Too small an object can be too difficult, just like too large an object. When you make a ring you get to practice bending, hammering, soldering and working with your precision to get the right size. You can also make a necklace, a pendant, where you cut out the shape that you then file, hammer and shape. With the two objects you have gone through many of the basic techniques you need to be able to move on.

2. Scale up!

If you want to proceed with the silversmith, you can now scale up the size of the objects you create. For example, you can make a bracelet to get some more material to work with. If you are not interested in jewelry making, you can make a small bowl or a small candlestick. The larger the object, the greater the risk - if the object is placed in the hand it is a reasonable size to work with in this step!

3. Equal to berries

Practice the detail feeling by creating two similar objects. Like, for example, two similar earrings. Creating two objects that are identical can be difficult, but the same is good enough! However, it may require some practice.

4. Solder, solder, solder

Practice soldering! Many people find that soldering is difficult. Therefore, it is important to practice. Over time, you can make longer and longer soldering. A small box as big as an old pentron is a decent size to practice soldering on. You can also practice by soldering two parts together into one.

5. Several parts in larger format

Work with several parts and go up in format! Imagine you have a plate and want to make a beaker in the shape of a glass with straight edges. You get to practice shaping the sheet into higher shapes by hammering it. Here you can also make a bowl that is a little taller and narrower, eventually a vase. Then it is often required that someone show how to do it.

Is silversmithing difficult?

It doesn't have to be! You can do a lot of nice things that are very simple. You can find something that fits all levels. That is the advantage of silver forging. It is large and wide and there is always something to learn!

Silver forging and jewelry design?

If you are specifically interested in jewelry making and want to learn how to create your own jewelry, this is the goldsmith you should invest in. It may sound counter-intuitive, but to create jewelry in silver, it's the goldsmith's techniques you should learn. In the goldsmith you will, among other things, learn to make stone frames that are better suited for jewelry making.

Find a course in silversmithing - Tips for choosing a silversmith course

- Based on what you prefer to learn. It may also be a good idea to see what the course leader has for the background. The course leader's experience is often telling which focus the course will have. Everyone who calls themselves a silversmith does not devote himself to silver forging, but may have a goldsmith background. In those cases, you will probably learn more about jewelry making. The courses may be different depending on who you attend. For some it may not matter, but for those who know what you want to learn, research is good.

Silversmith at home - here are the tools you need


  • Gas flame. Many people who start with, for example, a flame burner.
  • Soldering coal and solder tile.
  • Solder. A silver that melts into joints, precisely the solder is mixed with other metals so it gets a lower boiling point.
  • Flux to solder. A material used to prevent the silver from oxidizing during soldering.
  • Tweezers (solder tweezers). For example, a big beak that holds itself together and a regular tweezers.
  • Acid to put the silver in after soldering. Can use ordinary citric acid that you buy in the store.
  • Other tools such as files, hammers and anvils.


Many who are beginning to want to use as small a tool as possible. Unfortunately, the small tools are poorly controlled, as the hit surface becomes so small. Usually it is better to start with slightly larger tools to switch to smaller ones when you have better technology.

Tips to Consider Before Starting a Work in Silver Forging.

When you have an idea for a job, it may be worth thinking about certain things. You can start by sitting down and drawing up what you want. It can be good to think about how big and heavy the work gets. It may matter.


You have to decide if you want to use semi-finished parts of the work and what this should be. It is important to plan what kind of silver to use and where. Then you have to decide which kind of sheet and wire is suitable for the work. Here are some things to keep in mind:


  • Round wire thicker than 3mm in diameter becomes bulky as a ring.
  • Sheet to ring should be between 0.8-2mm in thickness.
  • Round hooks of 0.9 mm diameter are often used for micro hooks.
  • If you have to braid it is difficult to take a thicker thread than 0.8mm in diameter. Thicker thread requires strong fingers.
  • Threads at least 2mm in diameter are used for neck rings.
  • For pendant use at least 0.8mm thick sheet.
  • For closed rigid bracelets use at least 2mm diameter on round wire.
  • For wide, open and rigid bracelets 0.8 to 1.0 mm thick sheet is usually used.
  • For smaller chain links, threads of about 1.0 diameter are used. To larger links 1.5-2.0mm diameter of the thread. Threads that are thicker than 2.0 in diameter are difficult to bend into smaller shapes.
  • An earring must not weigh more than 7g.
  • Fine silver can be good to use in sockets as it is softer and does not spring back as much as sterling silver.


The next step is to figure out how much material you need. Formulas are used for rings. There are two common formulas. It is assumed that the circumference of a ring is the diameter times π. π = 3.14

π • The inner diameter and then 2 thicknesses are added to the plate or wire.
π • (inner diameter + thickness of plate or wire).
 π = 3.14

Examples of how to clean when a ring has an inner diameter of 18 mm and it should be made in sheet thickness 1 mm.

Formula 1: 18mm x 3.14 = 56.52mm Then add two thicknesses 2 x 1mm to 56.52 = 58.52mm should be the finished ring rail.

Formula 2: 18mm + 1mm = 19mm Then you multiply 19mm by 3.14. 19mm x 3.14 = 59.66mm should be the finished ring rail.

No. 1 will be slightly smaller than No. 2. For slightly thicker thread, No. 1 may be better and for slightly wider rings, No. 2 may be best. It may depend a bit on how to process the ring as well. If you have a wide ring, it often needs to be a little bigger and then No. 2 is best. Wide rings can be tricky the best is to try out with slightly wider ring dimensions.

Another way to find out how much material is needed for a piece of jewelry is to make a paper model and measure. Then you also get a glimpse of how big the work looks in reality and if it suits myself and you get an idea if you have chosen the right kind of thread or sheet for the work. I do not recommend it for ring rails, except when putting something on the rails. Then you can make a paper model of this, to see that the model fits with the size of the hand and the width of the ring rail.

The next step, which is the most important step , is to plan the order of the steps to make when you make the jewelry. You can have the order in your head or write down on paper or on your mobile. As a beginner, I would recommend that you write down the order in which you work. If something goes wrong you can go back and change the description next time.

This is especially true of the solder, in what order they come and which solder you should use. Maybe you have four parts that are soldered to two parts that are sanded and polished separately before soldering them together. That way you can use as hard as possible. The advantage of this is that the solder joint does not become unnecessarily yellow. Remember that open bracelets should not be boiled. Planning is tedious but important and you learn from your experience.

Jewelry making for the beginner

Do you want to make your own jewelry but do not really know where and how to start?

In addition to the creative work of designing and manufacturing jewelry, it is incredibly fun to be able to wear their own manufactured creations. Or maybe give as a gift to loved ones.


Here I go through the basics and gather my very best tips for the beginner who wants to learn how to make beautiful jewelry.

When you start looking around in stores that sell jewelry accessories, it can feel like a jungle and hard to know what you need to buy. But the fact is that you don't actually need that much material, accessories and tools to get started. Skipping the special tools and investing in the type of tools that are more general and can be used for several types of techniques.

You absolutely do not need to buy the most expensive tools. Sooner or later you will find out what you are comfortable with and then it may be worth investing in more quality.


What materials and tools are good to start with?

  • Wire wire is a metal wire with a plastic coating that is very durable that you can use with clamping beads.
  • Clamp beads used to secure the lock to the wire.
  • Cutting pliers are a must and are used to cut the wire.
  • Pliers are used to clamp the clamp beads.
  • Lock.
  • Double rings or chain.
  • The bead mat is not a must at first but greatly facilitates keeping the little beads in place on the table.
  • Beads. When buying pearls , it may be wise to start with a bag of mixed pearls. This way you get a good base with different beads quickly and cheaply and can try out what kind of beads you like and enjoy working with.
  • When you start working on your jewelry, you can start by thinking about how you want it to look. For example, try to put the beads on a row in front of you.


Borrow a book at the library or search for good instructional videos online. On Youtube there are many creative instructional videos about jewelry making. Once you understand the basics of how to make jewelry, it is great to experiment and test yourself until you find different methods that are right for you.

For those who want a little more guidance while you learn, you can always find a good course for jewelry making.

10 simple tips for getting started with beginner jewelry

Here are 10 simple tips for getting started with beginner jewelry. 1. Choose the type of jewelry that interests you the most. It can ...